Video calling and video meetings are replacing many face-to-face interactions in our new working world, but unified communications and collaboration wouldn't be nearly as efficient or successful without the imaging devices we rely on.
Device and endpoint challenges leaving you lost? Find you way with Collab Compass.
Today's webcams provide us with a virtual experience that's as close to the real in-person experience as possible. However, quality of imaging devices, their components, and optimizations can vary quite a bit, and this ultimately translates into overall experience quality.
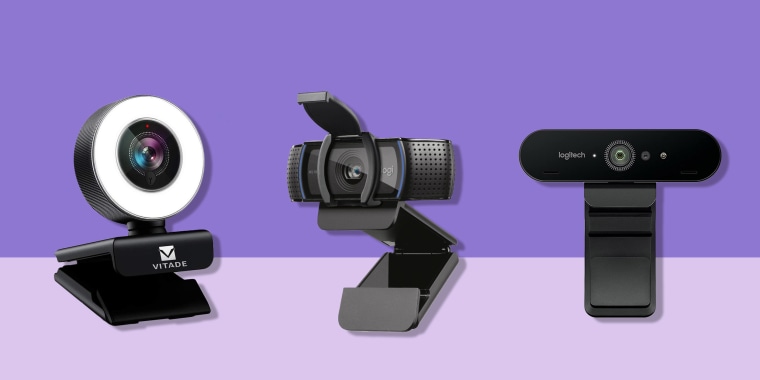 Image source: NBC News
Like any piece of technology in the UC arsenal, your webcam device can be prone to problems that can come from anywhere. Some of these include:
-
Issues with your camera driver, or driver software
-
Faulty wired or wireless device connection
-
Incorrectly configured system settings
-
Antivirus software interfering with connection
-
Outdated or incompatible webcam software
In this blog, we'll tackle some of the most common webcam issues and bring some troubleshooting tips to the table that will give you 'an all seeing eye' into fixing them.
Read our blog "11 Ways to have More Effective Virtual Meetings"
External webcam vs Integrated webcam
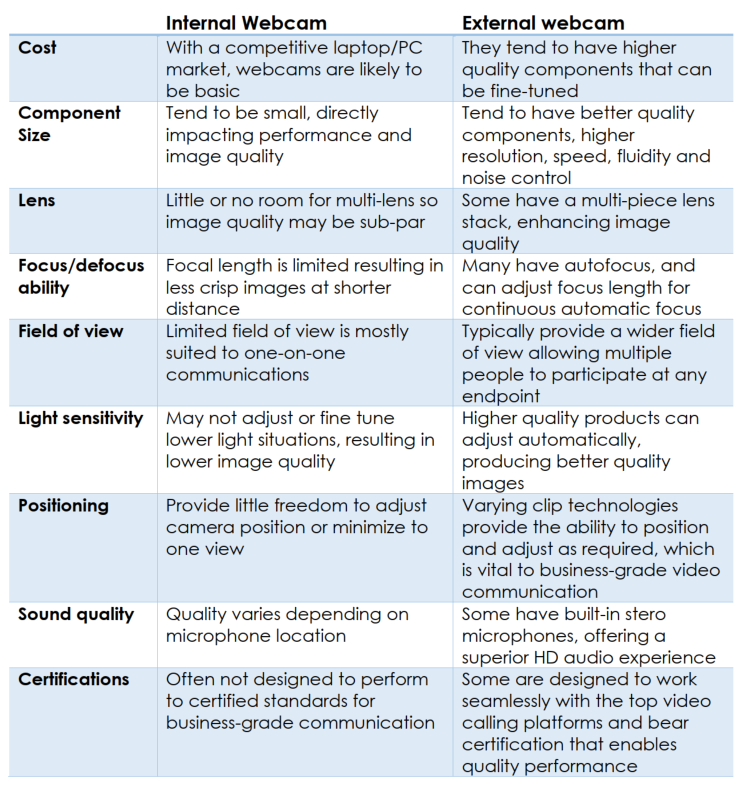
One of the most commonly asked questions is, "Why do I need an external web camera when my computer has one already built in?" A built-in camera can be useful, and for at-home use it's fine. But when it comes to quality of performance in enterprise organizations, an internal webcam may not be up to par compared to an external or "plug-and play" webcam. Below is a quick comparison between an external webcam and a built-in webcam
Fixing problems with your integrated webcam
Arguably, using an external camera as your default camera is preferable in terms of video call quality and overall experience. But as this is a troubleshooting guide for all webcams, we'll start with some problems and fixes for a built-in camera.
Camera not detected
Many laptops let you turn the webcam on and off with a physical button or keyboard shortcut. It’s possible that at some point you pressed this button to deactivate the webcam. If this isn't the problem then try these:
1. Check your camera settings. If your camera access is disabled in settings, no applications, including desktop apps, will be able to use it.
Open "Settings -> Privacy -> Camera," and allow apps to use your camera. Also, look at "Choose which apps can access your camera." Make sure the apps you require have camera access and are enables.
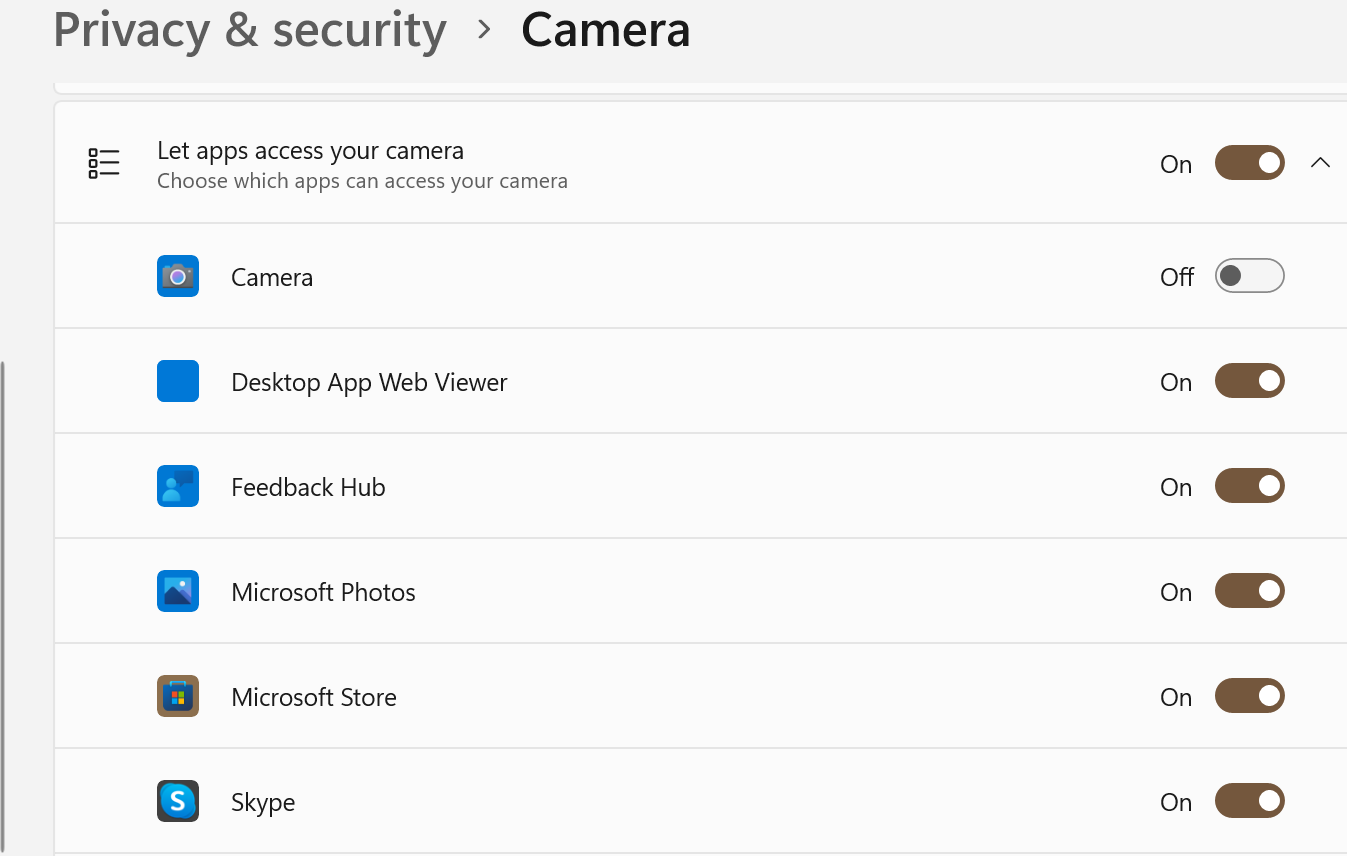
2. Check Windows Device Manager. Open Device Manager. Right-click the Start menu. Expand "Cameras," "Imaging devices" or "Sound, video, and game controllers branch." Right-click on your device and enable.
 Image source: Make Tech Easier
Check your antivirus software
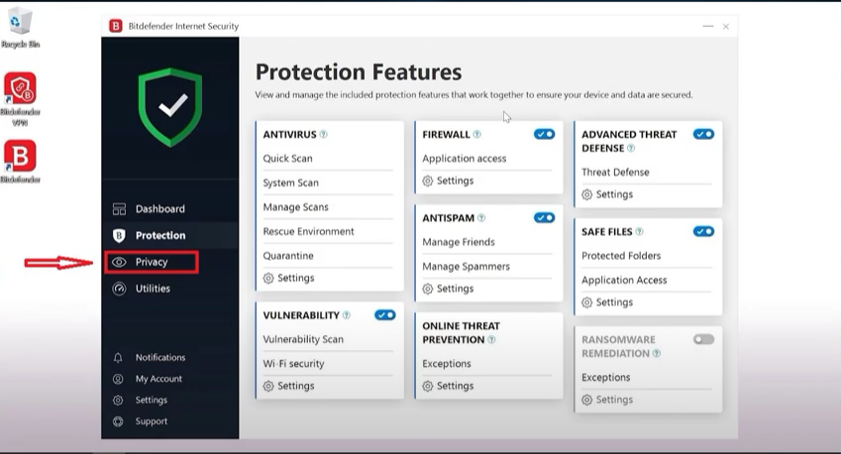
Antivirus software can sometimes affect the ability of your webcam to work, and may not allow the camera to turn on to avoid unauthorized access. Check the settings in your software or check the antivirus software company's website for more information. Usually all you need to do is allow access in the antivirus software by white-listing your webcam in the Privacy Settings.
Install or update camera driver software
Windows will usually install the necessary camera driver when it installs the hardware, but if your webcam is not working, you may need to visit the manufacturer support website and download the driver installation package. Even if your camera driver installed initially, it’s possible that there is an updated version that will solve your problem.
To update the webcam driver software, go to Device Manager and find the webcam device under the "Cameras", "Imaging devices" or "Sound, video and game controllers" branch and right-click it, then select "Update device driver" from the contextual menu.
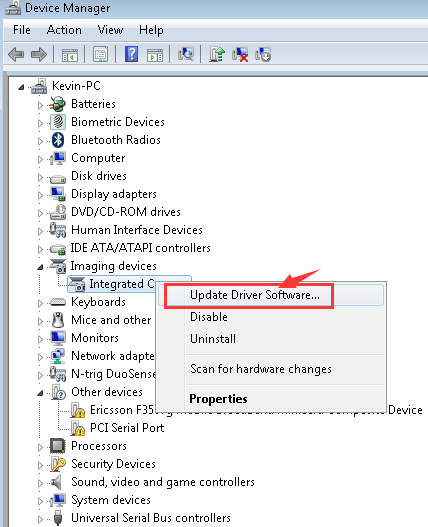 Image source: Driveasy
Troubleshooting your external video camera
With external webcams, you may get better quality and more options for visual enhancement, and as the hardware generally plugs into a USB port, it tends to be easier to troubleshoot camera issues.
The following USB video device issues and fixes are similar to what you'd do with built-in webcams, such as the install/uninstall driver option. But additionally you'll have the support of the hardware and devices troubleshooter pertaining to your particular brand of camera.
 Image source: HP
1. Test your webcam with another device
It may sound obvious but it should be the first thing you do. It's the simplest way to find out if it’s your device or webcam that’s to blame. Carry out the full setup process, and if you can, test it out on a video call to prove there’s nothing wrong with the webcam hardware.
2. Try a different USB port
Another obvious thing to try, but it's surprising how often this simple step can save invaluable time troubleshooting.
3. Make sure the correct device is enabled
Even if you’ve just connected your webcam, your computer may not have the right input device selected. Some devices also have a tendency to get confused when both a built-in and external webcam are available. Check the settings of the application you’re using to ensure it’s set to the webcam you want.
 Image source: Alphr
4. Check webcam settings
There are a few settings which may be preventing your webcam from working properly. Here’s how to check and change them if necessary:
-
Head to Settings > Privacy and select “Camera” from the left pane
-
Ensure that both “Camera access for this device” and “Allow apps access to this camera” are both turned on
-
Scroll down to where it says “Choose which Microsoft Store apps can access your camera” and ensure whichever software you’re using is turned on. This may simply be the “Camera” app but also conferencing platforms like Zoom or Microsoft Teams

Turn off the camera toggle switch for the apps you want to have restricted access to the camera. When you want to reinstate access, simply turn on the device toggle switch again.
5. Update webcam drivers
Often, after a Windows 10 or 11 feature update, the device drivers become incompatible. You might have to update the camera driver either through the driver updates software or using Windows Update.
-
Open Device Manager.
-
Under Imaging devices, find your camera.
-
Right-click, and then choose to update camera driver.
You can let Windows 10 use the update system to find the latest camera driver.
If your webcam is older, it may no longer work with Windows 10 or 11, or after you've done a Windows update. The best way to find out is going through camera properties in the Device Manager. If in the driver details button, there is a file with name stream.sys, then you need to replace your webcam.
 Image source: The Windows Club
6. Rollback webcam driver
Another common issue is that updated hardware drivers may be incompatible with Windows 10 or 11. One fix is to "roll back driver", which means installing a previous version. If you've just updated Windows, you may get the option to do this, otherwise you will need to download an older version and install it.
-
Open Webcam properties in Device Manager, and switch to Driver Tab.
-
Click on the Roll Back Driver button, and then choose Yes.
-
After the rollback is complete, restart your computer, and then try opening the Camera again.
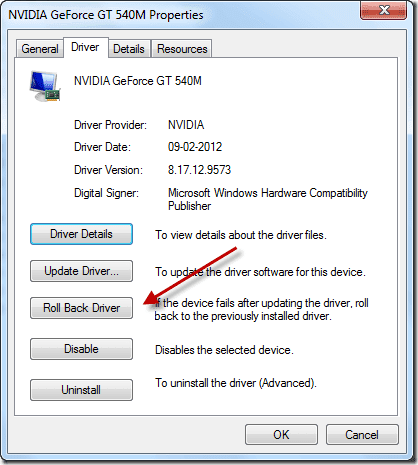 Image source: Desdecode
If the rollback option wasn’t available, follow the next step.
7. Uninstall and add webcam again
-
Open Device Manager > Webcam > Properties. Switch to Driver tab, and click on the uninstall button
-
Select "uninstall device" to uninstall the driver software, and then click OK
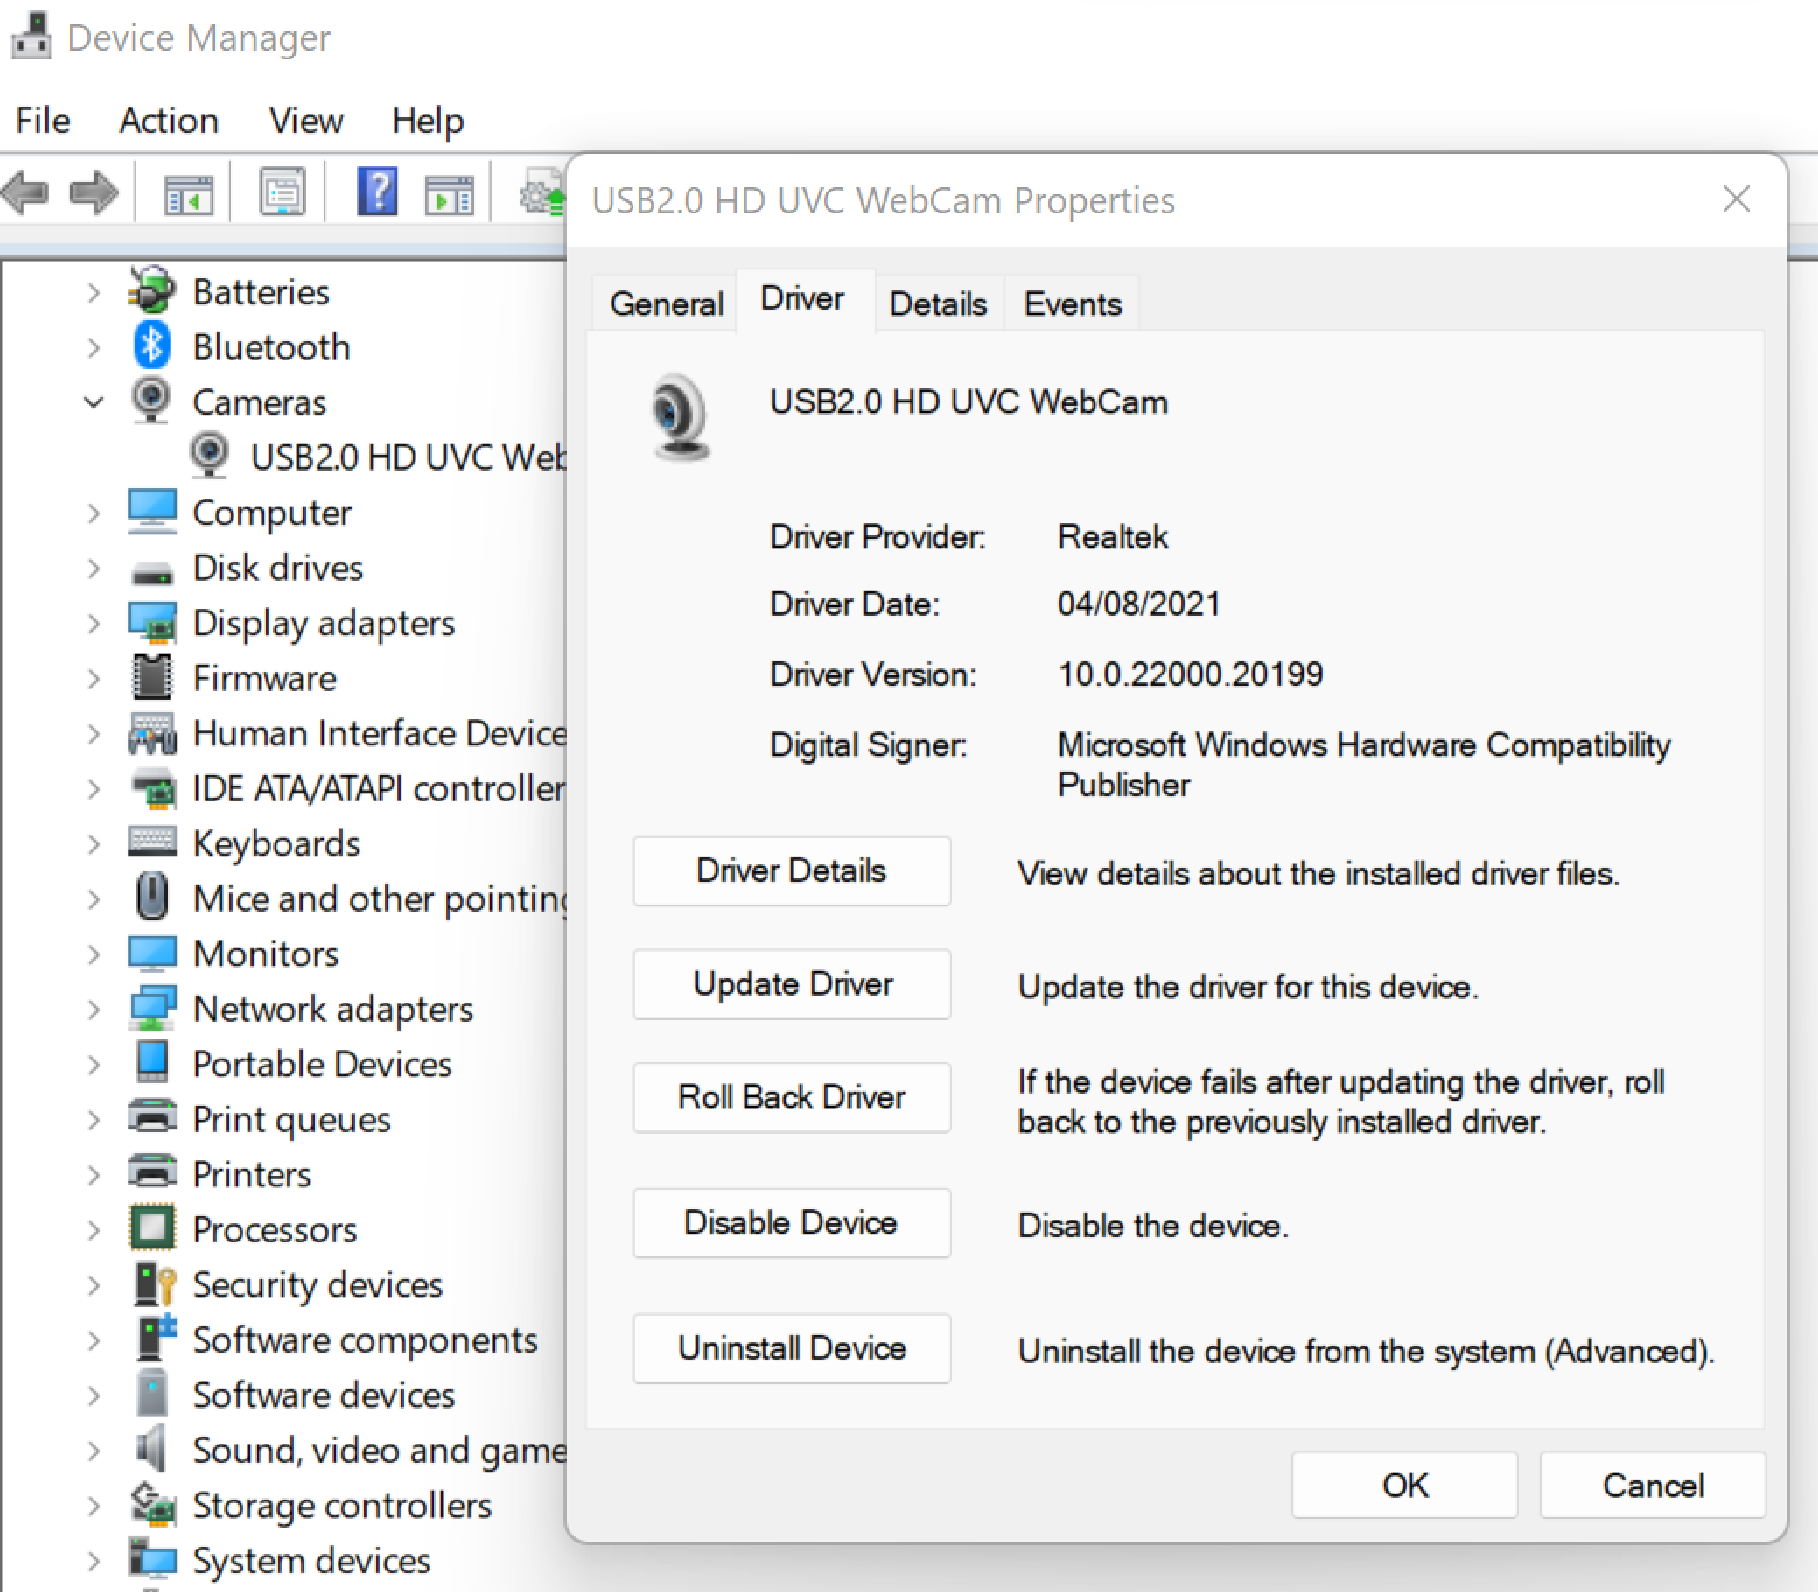
It should detect the camera, and then you can let Windows 10 reinstall camera driver, or you can do it yourself.
If you open the Device Manager and don't see your camera listed, use the "Scan for hardware changes" option. It's possible that your desktop computer or other device failed to detect the camera when you plugged it in, so it doesn't show up in the system.
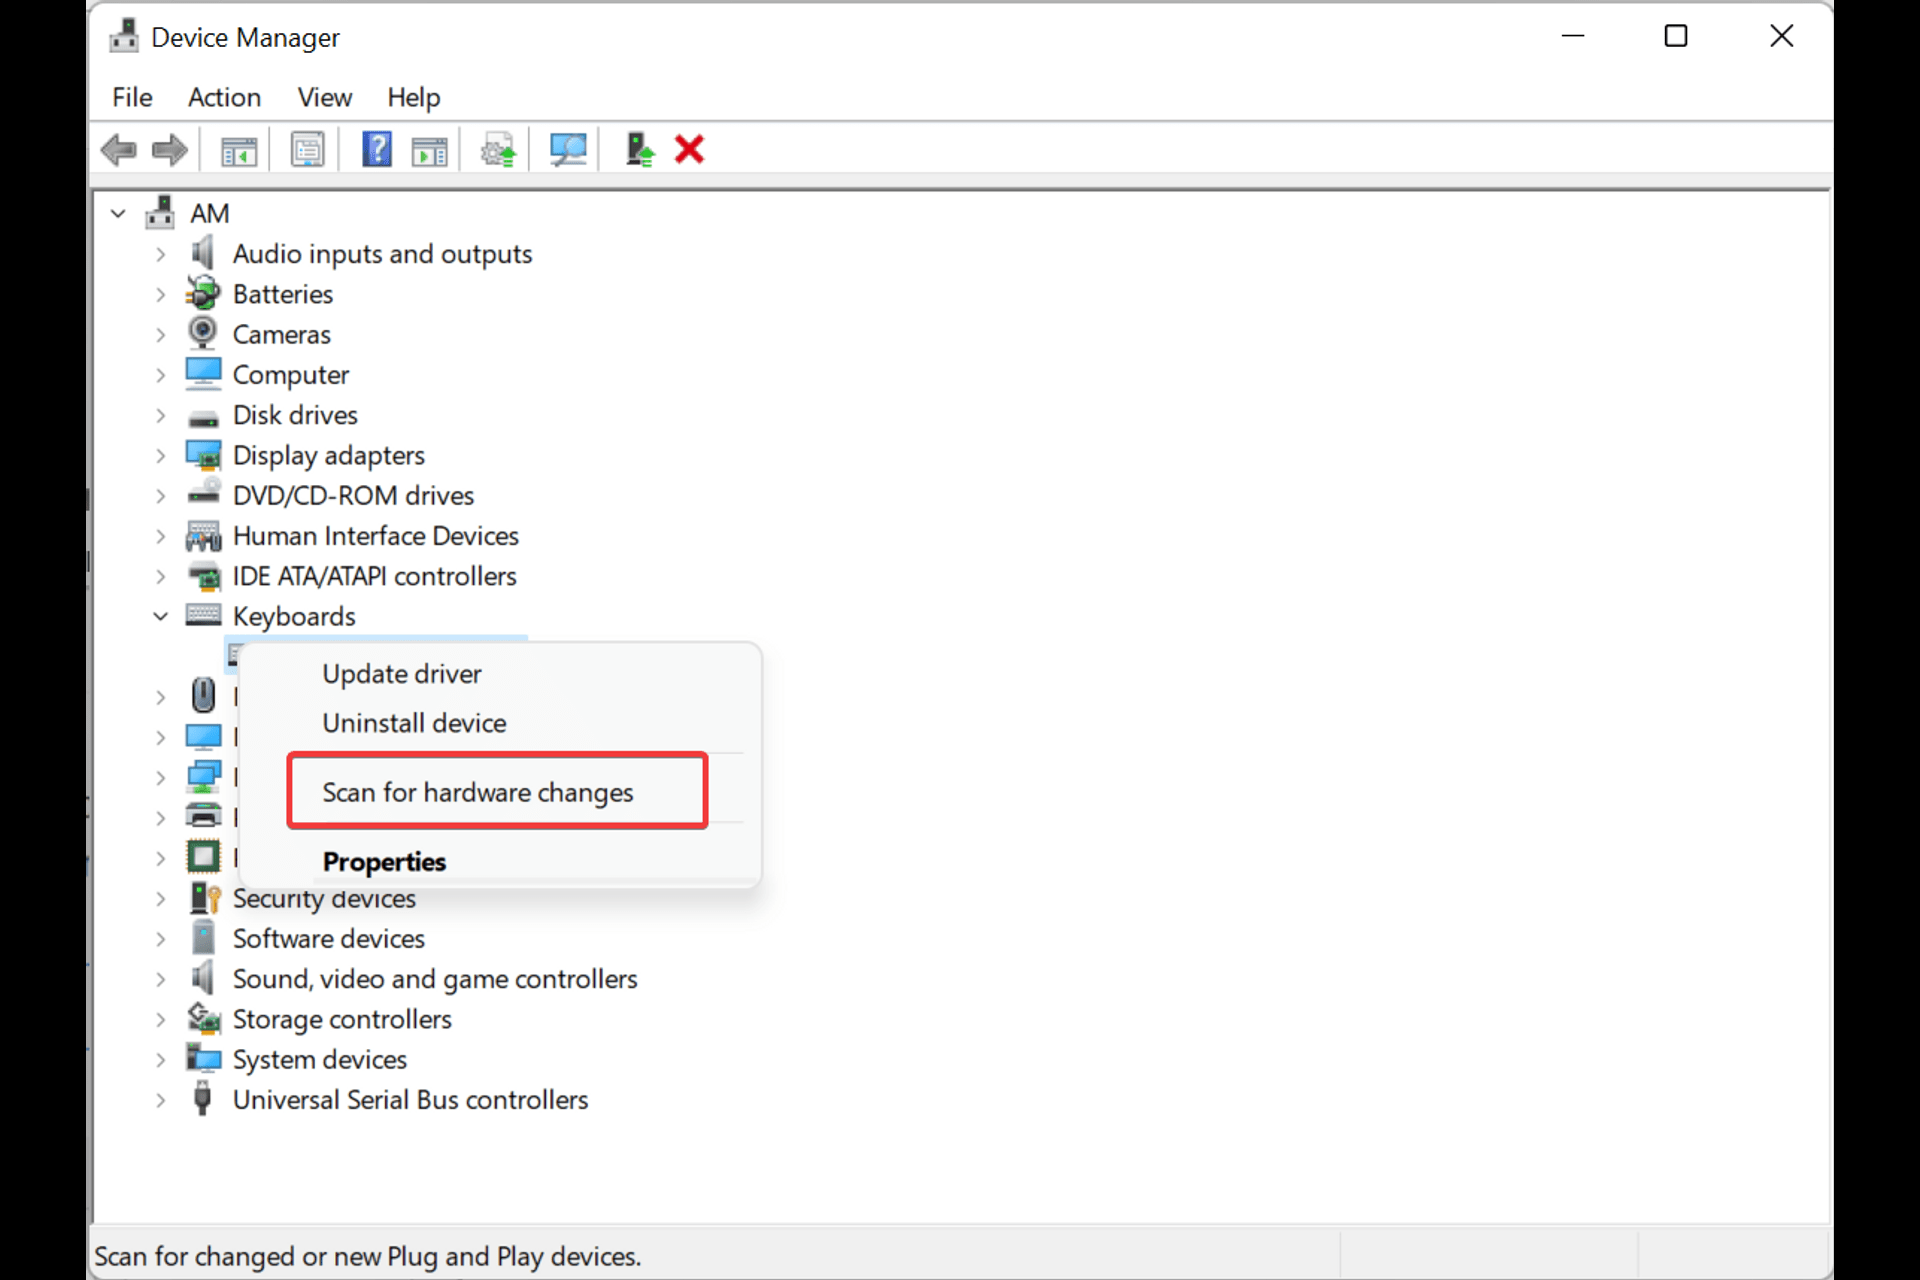 Image source: Windowsreport
Monitoring and performance management for a better experience
Hybrid work is here to stay. Conferencing platforms like WebEx, Microsoft Teams, Skype, Zoom, or Slack have all created astonishingly realistic virtual platforms thanks to the use of webcams and video conferencing technology. Read our comprehensive guide Hybrid Workplace Models are the New Normal to learn more.
But what happens when your virtual meeting is persistently hindered by technical issues? Things like poor quality audio and video due to latency, packet loss or jitter can de-rail an important meeting, sabotage your brand and ultimately affect your bottom line.
You need assurance that employees, partners, customers, and other stakeholders can remain connected, but just as importantly, if things do go wrong, you need to know exactly where, when, why, and how to fix it. Find out why Testing Your Collaboration Tools is crucial.
IR Collaborate
IR Collaborate gives you the visibility you need into your entire UC environment so that you can pinpoint the exact source of end user, device or application problems, in real time. With our leading monitoring and performance management solutions, IT teams can track exactly which apps and devices are being used by which employee, their locations, and even data usage. Full visibility and endpoint accountability can even enable teams to prevent problems before they happen.
Whether employees are on-premises using corporate supplied webcams and audio devices, or working primarily with BYO devices, or a combination of both, device monitoring and management is a critical part of securing applications and data, and enabling business continuity – and success.


